How to Prevent Pinholes During Car Putty Application
19 November 2025 | By superadmin
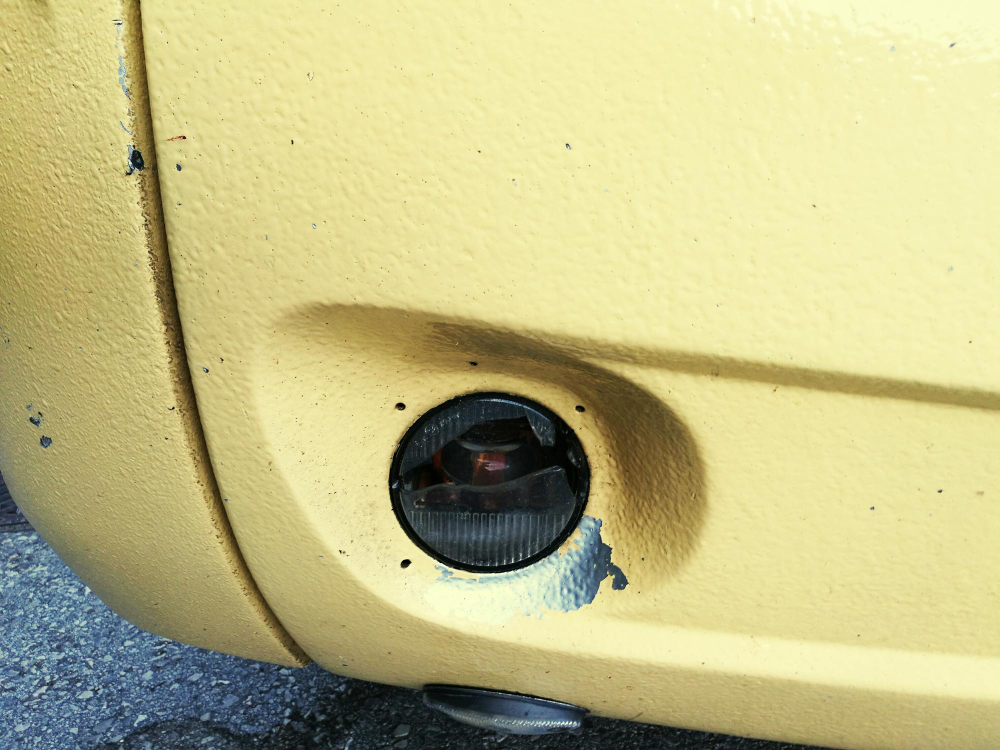
Pinholes, or tiny holes that appear after the putty application process, are one of the most common issues in car body repair. Although they may seem minor, these defects can reduce the quality of the final paint finish and make the surface appear uneven.
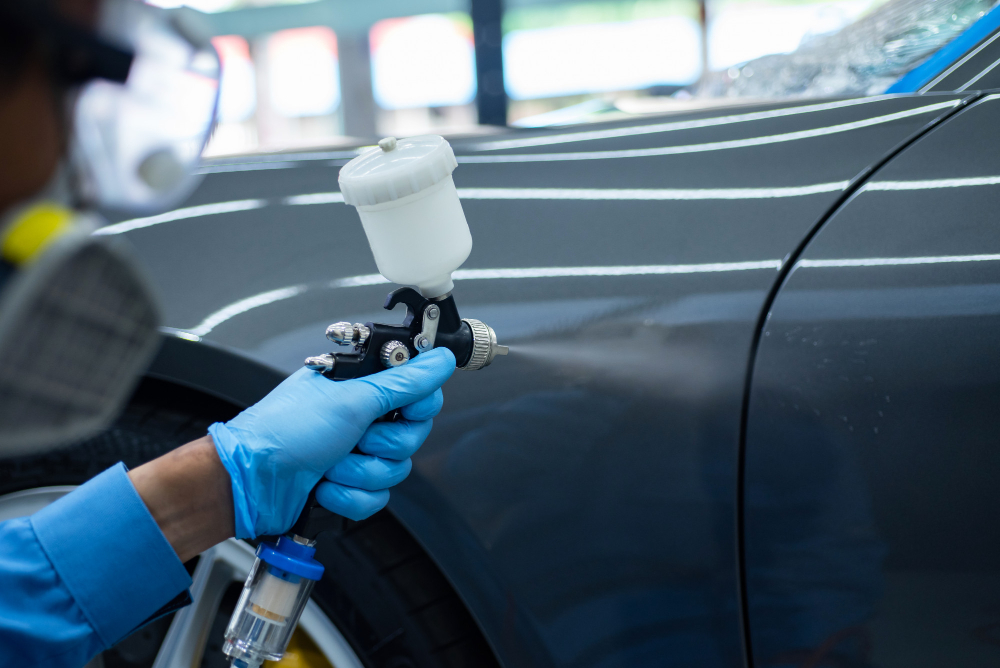
Preventing them requires a thorough understanding of proper putty application techniques, from mixing and spreading to sanding. By choosing the right car putty sanding tools and applying precise techniques, the putty finish can become smoother, even, and free of pinholes, ready for professional finishing.
What Are Pinholes and Why Do They Occur?
Pinholes are tiny holes that appear on the putty surface after drying or sanding. Visually, they look like small dots that disrupt the final paint finish and often become noticeable only after the finishing stage. This issue is generally caused by air trapped within the putty mixture or between layers during the application process.
Common Factors That Cause Pinholes on Cars
The appearance of pinholes on a car putty surface is often caused by a combination of technical errors and suboptimal working conditions. One of the main causes is mixing the putty and hardener too quickly or unevenly. When stirred roughly, air can easily become trapped in the mixture, forming small bubbles. These bubbles then appear as pinholes once the putty dries.
In addition, incorrect hardener ratios also have a significant impact. Using too much hardener causes the drying process to occur too quickly, preventing trapped air from escaping. On the other hand, using too little hardener makes the putty soft and difficult to level, resulting in an uneven final finish.
Another often-overlooked factor is the cleanliness of the surface before applying putty. Residual oil, dust, or fine dirt can reduce the putty’s adhesion to the metal surface, creating tiny cavities that are hard to detect until the sanding process is complete.
Additionally, applying a putty layer that is too thick in a single pass is a common cause. Thick layers tend to trap air, so it’s better to apply multiple thin layers, allowing air to escape completely before adding the next coat.
Finally, unstable room temperature and humidity—such as excessive heat, cold, or moisture—can accelerate solvent evaporation. As a result, tiny cavities form on the surface, leading to pinholes after drying. By controlling these factors, the putty application process can produce a smoother, more even, and defect-free surface.
Why Do Pinholes Appear After Putty Application?
Pinholes often only become visible after the putty application and sanding process is complete, forcing technicians to redo the work from scratch. This occurs because the physical and chemical processes during putty application did not proceed perfectly.
1. Uneven Mixing of Putty and Hardener
An imbalanced mixture of putty and hardener is one of the most common causes of pinholes. If the mixture is not homogeneous, some areas will dry faster while others remain wet. When this happens, air becomes trapped between layers, forming small bubbles that later dry into pinholes. Stirring the mixture too quickly can also introduce air, increasing the risk of pinhole formation.
2. Dirty or Moist Panel Surfaces
Before applying putty, the panel surface must be completely free of oil, dust, water, or rust residues. Moisture or fine contaminants can interfere with the putty’s adhesion to metal or fiberglass. When putty is applied over an imperfectly clean surface, air and moisture can become trapped underneath, then expand and leave tiny holes once the putty dries.
3. Excessively Fast Drying and Sanding
Rushing the drying process, such as using high temperatures or excessive airflow, can cause the outer layer of the putty to harden first while the inner part remains wet. As solvent vapors rise from below, tiny holes form on the surface. Similarly, sanding too quickly before the putty is fully dry can disturb trapped air, creating new pinholes as pressure from the sanding opens unstable cavities.
The Role of Car Putty Sanding Tools in Preventing Pinholes
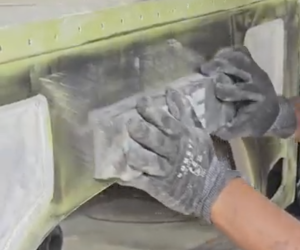
Car putty sanding tools function to level the surface and prevent pinholes caused by trapped air or uneven putty layers. With proper sanding, the surface becomes smooth, micro-pores are opened, and the putty thickness can be better controlled. This process also ensures the layer is fully dry and ready for painting without the risk of defects or bubbles in the final finish.
Types of Car Putty Sanding Tools and Their Uses
There are several types of car putty sanding tools used depending on the stage and repair needs. Manual sandpaper or sanding blocks are ideal for fine leveling and precise pressure control. For larger areas, technicians typically use orbital sanders to achieve faster and more even results. Vacuum sanders, equipped with dust extraction, are also available to keep the surface clean during the process. Choosing the right tool helps prevent excessive material removal and ensures the putty finish remains smooth, dense, and free of pinholes.
How to Use Car Putty Sanding Tools
When using car putty sanding tools, the first step is to ensure the putty is completely dry before sanding. Use sandpaper with a grit suitable for the stage of work: coarse (P80–P120) for leveling, followed by fine (P240–P400) for finishing. Move the tool evenly without applying excessive pressure to avoid creating waves on the surface. Regularly clean off dust to maintain a smooth finish and prevent the formation of new pinholes.
Recommended Sandpaper Grit Sequence for a Smooth Finish
To achieve a smooth, pinhole-free finish, following the correct sandpaper grit sequence is essential. Start with coarse sandpaper (P80–P120) to shape and level the putty surface. Next, use medium-grit sandpaper (P180–P240) to remove the marks left by the coarse sanding. Finally, finish with fine sandpaper (P320–P400) before painting to ensure the surface is completely smooth and ready for primer or base coat. This sequence helps create an even surface without damaging the putty layer.
RELATED NEWS
16 Desember 2025
Car Repainting Steps & Essential Automotive Paint Materials
In the refinishing process, the quality of the final paint result is not determined solely by the
Read More >>
15 Desember 2025
Simple Tips to Protect and Maintain Your Car’s Exterior Paint
Taking care of your car’s exterior paint is actually not complicated, as long as it is done
Read More >>